
![]()
 Step
1: Choose a photograph to color.
Step
1: Choose a photograph to color.
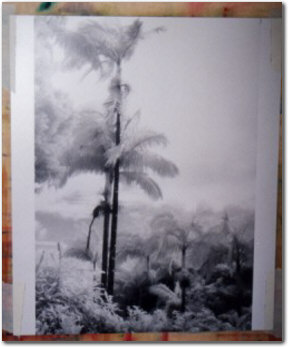
The easiest black & white photographs to color are ones with more overall gray tones, rather than photos with more stark black and white. Pure black does not take color well, because the color just sits on top of it. Pure white does not take color well either because there are no details to give the area depth.
This is not to say that high contrast black & white photos do not ever work, because the end result will always reflect the vision and the talent of the artist. Photographs for hand-coloring should be printed on some kind of matte photo paper. I like using Kodak P-Max Art paper (a resin-coated paper that has a rough feel to it), however there are many other matte papers that work fine.
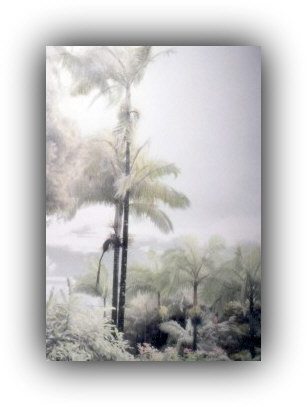
In this example, I chose an infrared photo slightly over-exposed to achieve the grain that I envisioned as the final result.
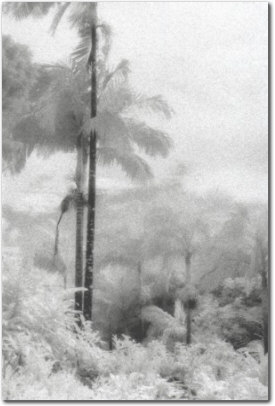
I usually bracket my shots when I shoot with infrared film, and here are the other 2 choices of this shot that I had to choose from.

Step 2: Choose your colors.
 I
use all brands of artist’s oil colors, along with Marshall’s Photo Oils and
pencils. I have found that most oils will work, as long as there is a transparency
to the color.
I
use all brands of artist’s oil colors, along with Marshall’s Photo Oils and
pencils. I have found that most oils will work, as long as there is a transparency
to the color.
Most of the color is wiped off, anyway. I have found that acrylic paints do not work on photos because they are too opaque.
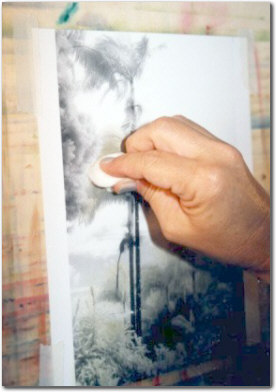
Step 3: Cover the photo with a wash of the background color.
Use a cotton ball (pure cotton, not synthetic) to wipe the paint on.
Don’t worry about staying in the lines, because the edges will be cleaned later.
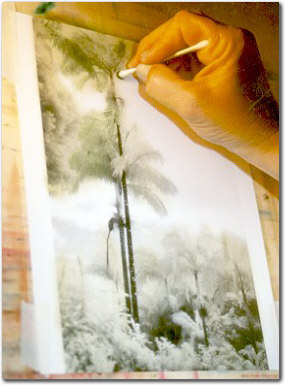
Step 4: Use a cotton-tip applicator (again, pure cotton) to add other colors in more detailed areas.
Continue to add color and depth until you achieve the look you want.
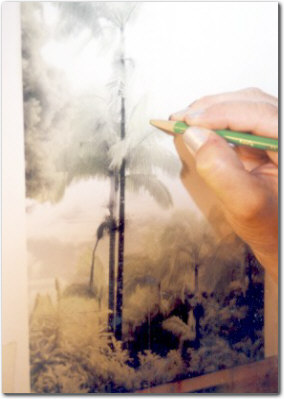
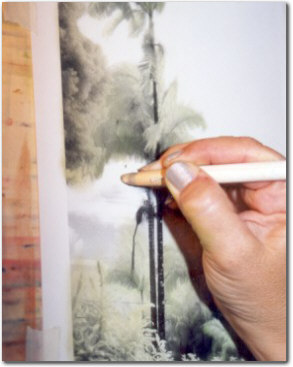
Step 5: Use pencils to add small detail.
I usually use Marshall’s Photo pencils, however, I supplement the colors with other artist pencils that work just fine.
Step 6: Clean any areas that need to stay white.
 In a portrait, that would be the eyes and the teeth in particular. Again, there
are several ways to clean off the white areas. I use regular erasers – the kind
that can be sharpened with a pencil sharpener.
In a portrait, that would be the eyes and the teeth in particular. Again, there
are several ways to clean off the white areas. I use regular erasers – the kind
that can be sharpened with a pencil sharpener.
Marshall’s also makes a cleaner called "Marlene" that can be purchased separately or with a photo-coloring kit. Marlene is applied with a cotton-tip applicator, or for smaller details, a small stick wrapped with cotton.
Step 7: Look at the final result in all kinds of light to make sure there are no areas that need cleaning or more color. Let the photograph dry – usually overnight is fine, but this will vary with humidity and the amount of color on the photo. Once the photograph is dry, I usually choose a matte to finish it off.
I do not always work exactly through these steps every time. The best way to learn hand-coloring is to practice. Get lots of pictures and color them. You will probably develop your own technique - one that works perfectly for you.
In my library, I have several books on hand-coloring that have been helpful to me over the years. Here are a few of them:
The Official Marshall’s Handcoloring Guide and Gallery by Grace and George Schaub
Handcoloring Photographs by James A. McKinnis
The Art of Handpainting Photographs by Cheryl Machat Dorskind
Handcoloring Black & White Photography by Laurie Klein
Each of these books gives a detailed step-by-step guide to handcoloring, as well as galleries featuring the work of hand-colorists who have been successful at showing and selling their work. It is inspiring and educational to look through the work of others to determine what you like, and what art inspires you.
![]()
Press <Ctrnl D> to Bookmark this site now!

 Home | About the Photographer | About this Website
 Process Page  |  Praise Page  |  Portfolio
 Prices  | Purchase
 Online Store
 Site Map
Phone: 714-368-PLAY (7529) | Fax: 253-669-8149 Email: sharyn@atplayphotography.com Sign Our Guestbook | View our Guestbook
|